
What are #9 envelopes and how to get yours custom printed.
Envelopes printing and more specifically, #9 envelopes are still a common and very popular tool in the daily operations of a business or any size office in our increasingly digital times. Most people will know about or are at least familiar with #9's big brother, the #10 envelope or "business size" envelope, unaware that they're both business mailing envelopes and using both will yield better results for your business.
#9 envelopes are mailing envelopes measuring 3-7/8" x 8-7/8" and are one of the most popular commercial-sized envelopes available. They are commonly used as a regular mailing envelopes, remittance envelopes, reply envelopes for invoices and are usually sent to recipients inside #10 envelopes so the recipient is able to mail something back to the sender. The best way to custom print yours is by creating a layout/design that is in-line with your brand and other marketing pieces into a PDF file that you can use to order them online or at your preferred printing vendor. #9 envelopes are also popularly used in direct mail campaigns since they are machine-insertable which works well for higher-volume campaigns.
How to make your #9 envelope work for you.
Given its popularity most users will unfortunately not have these envelopes work to their fullest potential. What do I mean by that? If you're using these envelopes you are most likely running an established business, are self-employed or even a freelancer that is somewhat organized. You have #9 envelopes that have your name and contact information you're likely using in combination with #10 envelopes and also with a parallel emailing campaign etc., etc.
Make your #9 envelope work for you by making it into another marketing medium, just like you're probably doing with your #10 envelopes. Don't just have your name and address on the envelope and for the love of [insert thing you love here] don't just handwrite your information on there. Unless you're an extremely talented calligrapher and that is the service you're offering don't hand write your envelopes, it's a waste of time and it should not be the look you want to convey about your business.
Treat your envelope and any communication/marketing piece used by your business with the care, attention and creativity that you'd dedicate to your business cards. Just like those business cards you spent time, effort and money developing, those envelopes are going to be client facing assets (yes, assets!) that will speak volumes about your business and brand. Plus keeping brand consistency throughout all your marketing pieces is always a good thing.
How to create the best #9 envelopes for your business.
The best way to create amazing envelopes or any marketing/communication piece for your business is with a clean slate. Whether it is you donning your creative hat or a designer you're paying to do this, starting with a clean slate is the best start. Use any page layout program you like.

Definitely add your logo and fonts to extend the brand to your #9 envelopes. If you're printing them offset (more on this later) consider printing the entire face, flap or the entire envelope in a solid color or colors. Want to add an image to your envelope? Go for it, just make sure your image file is high resolution too.
Tip: Web images are NOT high resolution but you can use them in certain cases with good results depending on the size of the image you download and the size that it will be printed at on your envelope.
Once you've created your design, you're happy with it, you've gotten opinions from friends and family, it's time to print. Create the high resolution PDF and sign into or head out to your preferred printing company. If you're not feeling confident that the PDF file you've created will cut it as far as quality, size, or other criteria, when it's time to print your printer will easily and quickly be able to check and let you know if all looks good.
Envelope custom printing: digital vs. offset printing.
Your file looks good, it passed pre-press checks at your printer and your #9 envelopes can be printed. Before you get to this step you will have determined and discussed with the shop the quantity of envelopes you'd like custom printed. This quantity will determine whether your envelopes are digitally printed or offset printed. Typically if you're printing a low quantity, say 500 envelopes or less it may be more cost effective and faster to print digitally with excellent results.
Digital printing envelopes however, may limit the area you're able to print on the envelope since digitally printed envelopes are not usually converted (printed as blank sheets then assembled to envelopes). Nor will you be able to print in anything other than full color.
Offset printed envelopes will be more cost effective if you're printing in quantity, say 1000 pcs. or more. You also have the option of being able to print Pantone color match inks, can apply heavy ink coverage in a section or throughout the entire envelope if your printer is able to convert them and another option that is not as popular now but still available if desired, you can add a raised printed effect to offset printed envelopes. To each his/her own.
#9 envelopes printed in 1, 2 color, full color or Pantone color match?
Full color printing is just the norm these days many if not most things, envelopes are no exception. There are still some envelopes that only require black and white printing of contact information and nothing else. If this is what you need fine, but if you have a client-facing envelope that you're stubbornly keeping as basic as possible because you're afraid it may cost too much to print in full color, think again and talk to your printer. You may be surprised to know there is little if any price difference, again depending on quantity.
If what you need are simple 1 or 2 color (standard, non Pantone colors) then either offset or digital printing will be able to achieve that, it would all depend on the quantity of envelopes being printed. One thing to keep in mind here is if you do want say, black and red ink envelopes in a quantity that is best digitally printed know that digitally printing that black and red is actually done in full color. Digital presses print in full color (CMYK), so don't expect a color match.
If you want colors picked out of a Pantone book for your envelope color(s) however, then offset will be your only option whether you're printing 100 or 100,000 and there is definitely a premium when color matching. If you have a printer that does great color match work, hang on to them. Consistent color match printing throughout all your printed materials is an invaluable thing that will pay for itself and keep your brand on point.
With this information in hand we think you should be able to get some great custom printed envelopes that will not only do their main job but will do also be excellent on-brand promotional pieces for your business. That's a win-win.
Envelopes frequently asked questions:
1. What is the difference between Digital Envelopes and Offset Envelopes?
Digital Envelopes are pre-converted and printed on high tech digital equipment.
Offset Envelopes are printed on offset gang runs, then die cut and converted to envelopes. We print both on 70# premium opaque text stock.
2. How do I set up an Offset envelope?
- 1/16” overbleed and color wrap onto the back of the envelope is required to allow for movement throughout the bindery process.
- Artwork with bleed on face or print on any flaps must be accounted for in your file layout.
- Solid, full color envelopes are recommended (to eliminate overbleed).
- Intentional extension of flap color onto envelope face is recommended.
- Gradients are recommended for smoother color transitions.
3. How do I set up a Digital Envelope?
- The bleed required is 0.125" (0.0625" on each side).
- Text and images should be at least 0.25" from the edge.
- Artwork with more than 40% ink coverage must be submitted as an offset product.
- Full color backgrounds should be avoided.
- Use a white backgrounds with low ink coverage (e.g. logo and text only).
- Avoid or limit use of transparencies and gradients.
- For window envelopes, the window area must be free of ink.
4. Can I print on the back flaps of Digital Envelopes?
Yes. To get print on the back flaps only, choose 0/4. For print on the front and the back flaps, choose 4/4. Keep in mind, artwork with more than 40% ink coverage must be submitted as an offset product.
5. How do I setup a Digital Envelope with window?
DO NOT place artwork or color on the window area. Keep images at least 1/8" inch away from the edge of the window. Digital Envelopes are pre-converted and have a plastic window adhered to the window area prior to printing. The window area must be blank.
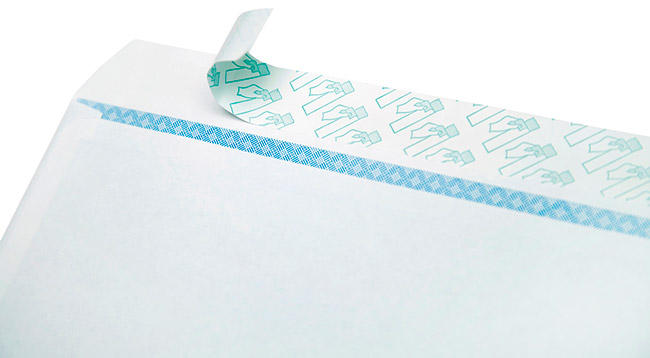
6. What type of security features do digital envelopes with security tint have?
Security Tint Envelopes have a blue crisscross pattern on the inside of the envelope which distorts the message on the document enclosed within, which prevents the contents from being read or deciphered. For your convenience, they also come with a self adhesive strip.